
10 Quick and Easy Desserts for Any Occasion
If you're looking for simple yet satisfying desserts that won’t have you sweating in the kitchen, you’ve come to the right place! These quick and easy recipes will satisfy your sweet tooth without taking up all your time. Plus, there’s a gluten-free option included, so everyone can indulge. Let’s dive in and whip up some sweet treats!
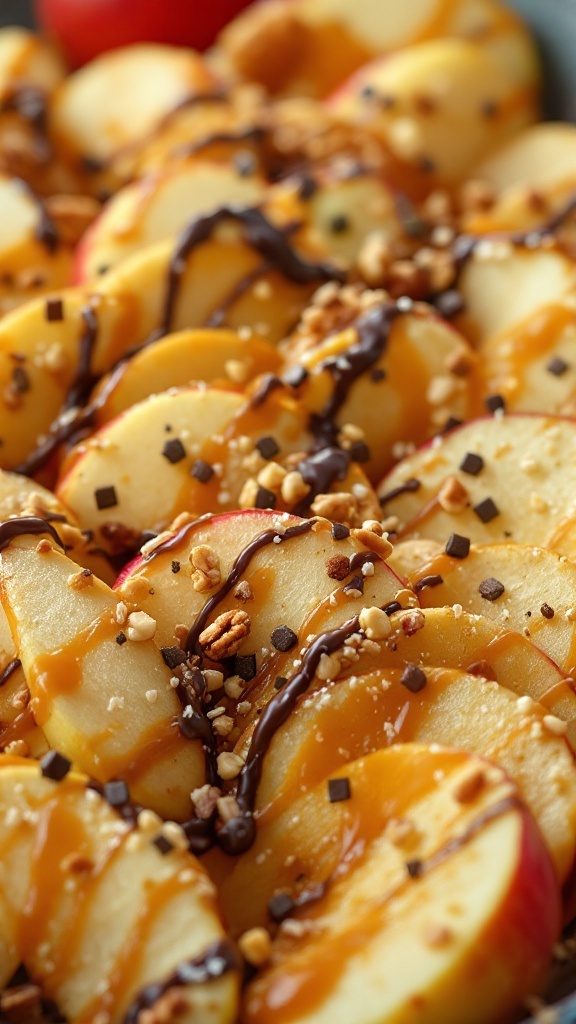
Apple Nachos

Apple nachos are a fun and delicious treat that brings together the sweetness of apples with the rich flavors of caramel and chocolate. This simple dessert is perfect for satisfying your sweet tooth while still feeling light and fresh. It’s an easy recipe that anyone can whip up in just a few minutes, making it ideal for gatherings or a quick snack at home.
This dessert allows for endless customization. You can add your favorite toppings, such as nuts, sprinkles, or even a drizzle of peanut butter. Plus, it's a gluten-free option when you choose gluten-free toppings. Get ready for a delightful crunch paired with creamy sweetness!
Ingredients
- 2 large apples, sliced
- 1/4 cup caramel sauce
- 1/4 cup chocolate sauce
- 1/4 cup chopped nuts (such as walnuts or peanuts)
- 1/4 cup mini chocolate chips
- 1/4 cup shredded coconut (optional)
- 1/4 cup gluten-free granola (for a gluten-free option)
Instructions
- Slice the apples into thin wedges and arrange them on a serving plate.
- Drizzle the caramel sauce evenly over the apple slices.
- Follow with a drizzle of chocolate sauce for an extra treat.
- Sprinkle the chopped nuts, mini chocolate chips, and shredded coconut over the top.
- If desired, add gluten-free granola for added crunch.
- Serve immediately and enjoy your delicious apple nachos!
Peanut Butter Banana Bites
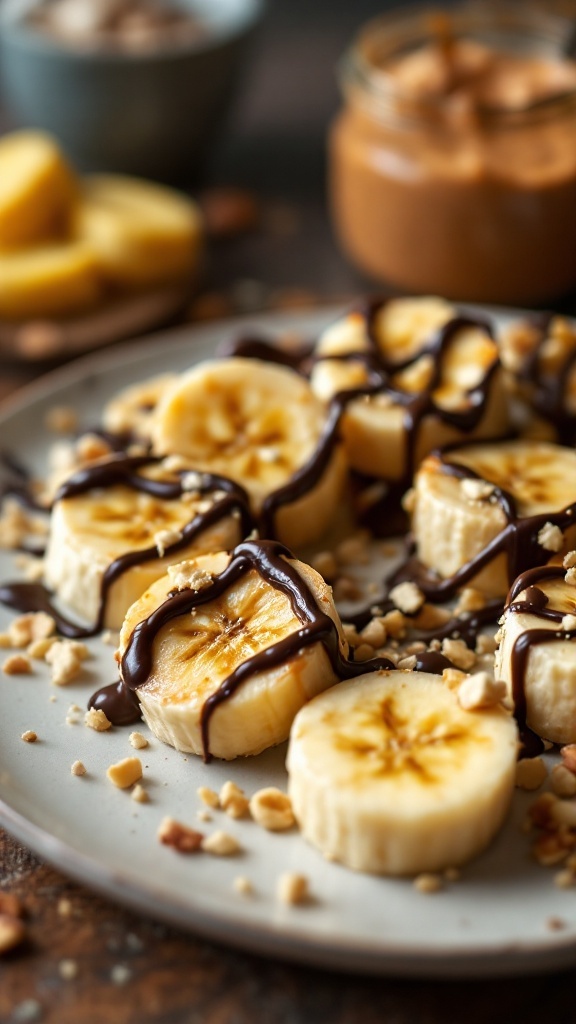
Peanut Butter Banana Bites are a delightful treat that blends creamy peanut butter with sweet banana slices, creating a simple yet satisfying snack. They’re easy to whip up and perfect for when you're craving something fruity and nutty. The combination of flavors offers a delicious balance that is both nutritious and indulgent.
These bites are great for kids and adults alike and can be enjoyed as an afternoon pick-me-up or a quick dessert. Plus, they can be made gluten-free by using gluten-free peanut butter, making them an inclusive option for everyone!
Ingredients
- 2 ripe bananas
- 1/2 cup peanut butter (or gluten-free peanut butter)
- 1/4 cup chocolate syrup (optional)
- 1/4 cup chopped nuts (like walnuts or pecans)
- 1 tablespoon honey (optional)
Instructions
- Slice the Bananas: Cut the bananas into bite-sized rounds and set them aside.
- Spread the Peanut Butter: Take a slice of banana and spread a thin layer of peanut butter on one side. Top it with another banana slice to create a mini sandwich.
- Drizzle Chocolate: If desired, drizzle chocolate syrup over the assembled bites for an extra touch of sweetness.
- Sprinkle Nuts: Add chopped nuts on top for some crunch and extra flavor.
- Serve: Enjoy immediately, or refrigerate for later. These bites are best eaten fresh but can be stored in an airtight container for a short time.
No-Bake Chocolate Mousse Cups

These no-bake chocolate mousse cups are a delightful treat that combines rich chocolate flavor with a light, airy texture. Each bite melts in your mouth, making it a simple yet indulgent dessert perfect for any occasion.
What’s great about this recipe is how easy it is to whip up. You don’t even need an oven! With just a few ingredients and minimal effort, you’ll have a delicious dessert ready to impress your family and friends. Plus, there's an option to make it gluten-free, allowing everyone to enjoy this sweet treat.
Ingredients
- 1 cup heavy cream
- 1/2 cup chocolate chips (semisweet or dark)
- 1/4 cup powdered sugar
- 1 teaspoon vanilla extract
- 1/2 cup crushed gluten-free cookies (like gluten-free Oreos) or regular cookies
- Whipped cream for topping
- Chocolate shavings for garnish
Instructions
- Melt the chocolate chips: In a microwave-safe bowl, heat the chocolate chips in 30-second intervals, stirring in between, until smooth. Let it cool slightly.
- Whip the cream: In a large bowl, whip the heavy cream, powdered sugar, and vanilla extract until soft peaks form.
- Combine: Gently fold the melted chocolate into the whipped cream until fully incorporated.
- Layer: In small cups or glasses, add a layer of crushed cookies, then spoon in the chocolate mousse on top.
- Chill: Refrigerate for at least 2 hours to set. Before serving, add a dollop of whipped cream and sprinkle with chocolate shavings.
Rice Krispie Treats
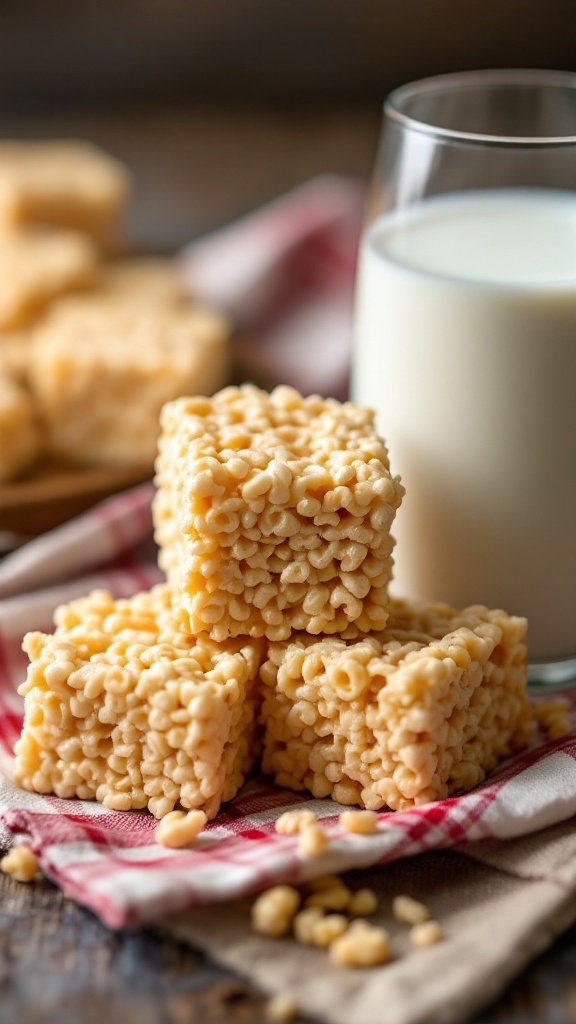
Rice Krispie Treats are a delightful, chewy dessert that brings back fond memories for many. With just a few simple ingredients, you can whip up these sweet treats in no time. They have a unique crispy texture and a sweet, buttery flavor that makes them hard to resist.
This recipe is perfect for a quick dessert or snack, and it’s incredibly easy to make. Whether you're making them for a party, a picnic, or just because, Rice Krispie Treats are sure to be a hit with kids and adults alike. Plus, there's a gluten-free option to cater to everyone's needs!
Ingredients
- 4 cups Rice Krispies cereal
- 1/4 cup unsalted butter
- 1 package (10 oz) mini marshmallows
- 1 teaspoon vanilla extract
- Pinch of salt
- For the gluten-free option: Ensure the Rice Krispies are labeled gluten-free
Instructions
- Melt the Butter: In a large saucepan over low heat, melt the butter. Add the mini marshmallows and stir until completely melted and smooth.
- Add Ingredients: Remove the saucepan from heat and mix in the vanilla extract and a pinch of salt. Gradually add the Rice Krispies cereal, folding it gently until the cereal is fully coated with the marshmallow mixture.
- Shape the Treats: Lightly grease a 9x13 inch baking dish. Press the mixture into the dish evenly, making sure it’s compact but not overly packed.
- Cool and Cut: Allow the treats to cool for about 30 minutes before cutting them into squares. Serve and enjoy!
Microwave Mug Cake

If you're craving something sweet but don't want to spend hours in the kitchen, a microwave mug cake is the way to go! This quick dessert is fluffy, rich, and chocolatey, making it a delightful treat for any time of day. Plus, it’s super simple to whip up, requiring just a few basic ingredients that you likely already have at home.
The best part? You can enjoy this warm cake straight from the mug, and it’s ready in minutes. Whether you’re treating yourself or impressing a friend, this easy recipe will satisfy your sweet tooth without any fuss. And for those who need a gluten-free option, I've got you covered!
Ingredients
- 4 tablespoons all-purpose flour (or gluten-free flour)
- 4 tablespoons granulated sugar
- 2 tablespoons unsweetened cocoa powder
- 1/8 teaspoon baking powder
- 3 tablespoons milk
- 2 tablespoons vegetable oil
- 1/4 teaspoon vanilla extract
- 1 tablespoon chocolate chips (optional)
Instructions
- In a microwave-safe mug, mix together the flour, sugar, cocoa powder, and baking powder until well combined.
- Add the milk, vegetable oil, and vanilla extract, stirring until you have a smooth batter. If you like, fold in the chocolate chips for extra gooeyness!
- Microwave the mug on high for about 1 minute and 30 seconds, but keep an eye on it to prevent overflow. The cake should rise and look set in the center.
- Let it cool for a minute before digging in. Enjoy your delicious mug cake warm!
Oreo Truffles

Oreo truffles are a delightful treat that combines the rich flavor of chocolate with the beloved taste of Oreos. These bite-sized desserts are not only delicious but also incredibly easy to make, making them a perfect choice for any occasion. The creamy center, made from crushed Oreos mixed with cream cheese, is enveloped in a smooth chocolate coating, creating a satisfying texture that melts in your mouth.
Whether you're hosting a party or just craving something sweet, these truffles will hit the spot. Plus, they can be made gluten-free by using gluten-free Oreos, so everyone can enjoy this tasty dessert!
Ingredients
- 1 package (15.35 oz) Oreo cookies (or gluten-free Oreos)
- 8 oz cream cheese, softened
- 1 cup semi-sweet chocolate chips
- 1 tablespoon coconut oil (optional, for smooth melting)
- Powdered sugar for dusting (optional)
Instructions
- Prep the Cookies: Crush the Oreo cookies into fine crumbs using a food processor. Transfer the crumbs to a mixing bowl.
- Mix with Cream Cheese: Add the softened cream cheese to the cookie crumbs. Mix until well combined, forming a dough-like consistency.
- Shape the Truffles: Using your hands, roll the mixture into small balls, about 1 inch in diameter, and place them on a lined baking sheet.
- Chill: Refrigerate the truffles for at least 30 minutes to firm up.
- Melt the Chocolate: In a microwave-safe bowl, melt the semi-sweet chocolate chips with coconut oil (if using), stirring until smooth.
- Coat the Truffles: Dip each chilled truffle into the melted chocolate, ensuring it's fully coated. Return to the baking sheet.
- Chill Again: Refrigerate the coated truffles for about 15 minutes until the chocolate is set. If desired, dust with powdered sugar before serving.
Instant Pudding Cups
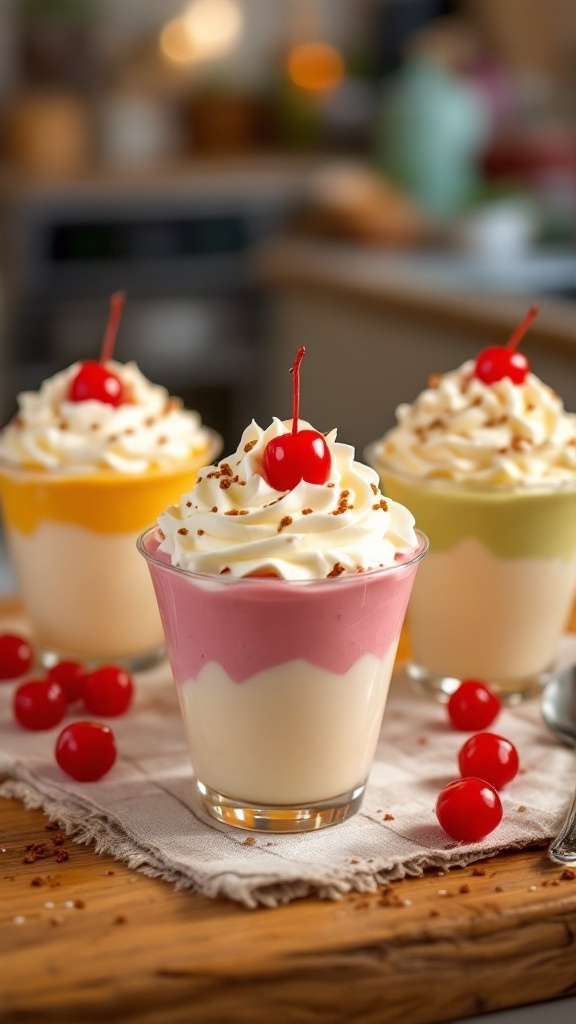
Instant pudding cups are a fun and simple dessert that bring a burst of flavor and color to any occasion. With just a few ingredients, you can create a delightful treat that is both creamy and satisfying. Choose your favorite pudding flavors, layer them up, and top with whipped cream for a dessert that not only tastes great but looks beautiful too!
What’s more, this recipe is incredibly easy to adapt. Whether you're in the mood for chocolate, vanilla, or something fruity, you can customize it to your liking. Plus, to make it gluten-free, simply use a gluten-free pudding mix, and you’re all set for a tasty dessert that everyone can enjoy.
Ingredients
- 2 cups of milk
- 1 package (3.4 oz) instant pudding mix (chocolate, vanilla, or your choice)
- 1 cup whipped cream
- Maraschino cherries for topping
- Gluten-free option: Use gluten-free instant pudding mix
Instructions
- In a mixing bowl, whisk together the instant pudding mix and milk for about 2 minutes until well combined and thickened.
- Layer the pudding in cups, alternating between different flavors if using more than one type.
- Top each cup with whipped cream and a maraschino cherry for a fun presentation.
- Chill in the refrigerator for at least 15 minutes before serving to allow the flavors to meld.
Fruit and Yogurt Parfait
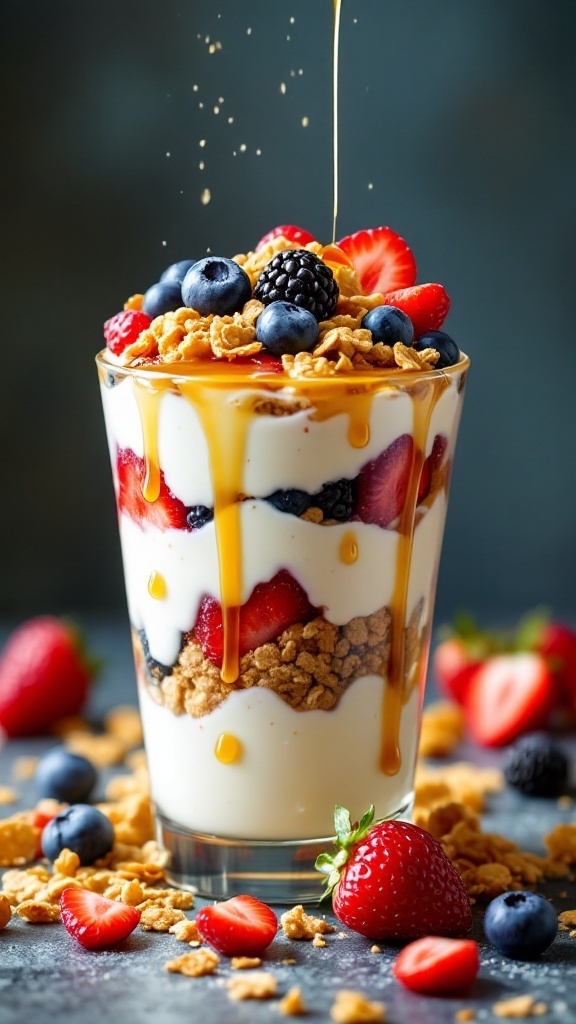
Fruit and yogurt parfaits are a delightful treat that combines creamy yogurt, fresh fruits, and crunchy toppings. This simple recipe is not only quick to prepare, but it also offers a refreshing taste that’s perfect for any time of the day. It’s a fantastic option for breakfast, a snack, or even a light dessert.
The layers of yogurt and fruit create a beautiful presentation, making it feel special without much effort. You can customize it with your favorite fruits and add a drizzle of honey or a sprinkle of granola for extra texture. Plus, it's easily adjustable for gluten-free diets by choosing gluten-free granola or oats.
Ingredients
- 2 cups yogurt (plain or flavored)
- 2 cups mixed berries (strawberries, blueberries, raspberries)
- 1 cup granola (or gluten-free granola)
- 2 tablespoons honey or maple syrup (optional)
- Mint leaves for garnish (optional)
Instructions
- Start by washing and slicing the berries, if necessary.
- In a glass or bowl, layer half of the yogurt at the bottom.
- Add a layer of mixed berries followed by a layer of granola.
- Repeat the layers with the remaining yogurt, berries, and granola.
- Drizzle honey or maple syrup on top, if desired, and garnish with mint leaves.
- Serve immediately and enjoy your tasty parfait!
Frozen Yogurt Bark

Frozen yogurt bark is a delightful and refreshing treat that’s perfect for snacking or dessert. It combines creamy yogurt with your favorite fruits and nuts, creating a vibrant, colorful, and satisfying bite. Not only is it easy to make, but it's also customizable, allowing you to use whatever toppings you have on hand.
This dessert is light yet satisfying, making it a great choice for warm days or a quick sweet fix. Plus, it’s a healthier alternative to traditional sweets, and you can easily make a gluten-free version by using gluten-free granola or nuts.
Ingredients
- 2 cups Greek yogurt (plain or flavored)
- 1/4 cup honey or maple syrup
- 1 cup mixed berries (strawberries, blueberries, raspberries)
- 1/4 cup sliced almonds or other nuts
- 1/4 cup granola (optional, use gluten-free if desired)
- 1 teaspoon vanilla extract
Instructions
- Prepare the Yogurt Mixture: In a large bowl, mix the Greek yogurt, honey or maple syrup, and vanilla extract until smooth.
- Spread the Yogurt: Line a baking sheet with parchment paper. Pour the yogurt mixture onto the sheet and spread it evenly to about 1/4 inch thick.
- Add Toppings: Sprinkle the mixed berries, nuts, and granola (if using) evenly over the yogurt layer.
- Freeze: Place the baking sheet in the freezer for about 4 hours or until the yogurt is firm.
- Break into Pieces: Once frozen, remove the bark from the baking sheet and break it into pieces. Enjoy immediately or store in an airtight container in the freezer for up to two weeks.
Chocolate-Covered Strawberries

Chocolate-covered strawberries are a delightful treat that perfectly balances the sweetness of chocolate with the tartness of fresh strawberries. They are easy to make and require only a few ingredients, making them ideal for a quick dessert or a special occasion. The creamy chocolate coating enhances the fruity flavor, creating a delicious bite that everyone loves.
Whether you’re preparing them for a romantic dinner or a casual gathering, chocolate-covered strawberries are sure to impress. Plus, they can easily be customized with toppings like crushed nuts or sprinkles. If you need a gluten-free option, simply ensure the chocolate you use is gluten-free, and you’re all set!
Ingredients
- 1 pound fresh strawberries
- 8 ounces semi-sweet chocolate chips (or gluten-free chocolate)
- 1 tablespoon coconut oil (optional, for a smoother chocolate)
- Crushed nuts or sprinkles (optional, for garnish)
Instructions
- Prep the Strawberries: Wash the strawberries and dry them thoroughly with paper towels to ensure the chocolate sticks.
- Melt the Chocolate: In a microwave-safe bowl, combine the chocolate chips and coconut oil. Microwave in 30-second intervals, stirring after each, until the chocolate is fully melted and smooth.
- Dip the Strawberries: Hold each strawberry by the stem and dip it into the melted chocolate, allowing any excess chocolate to drip off.
- Set on a Baking Sheet: Place the dipped strawberries on a baking sheet lined with parchment paper. If using, sprinkle crushed nuts or sprinkles on top while the chocolate is still wet.
- Let Them Set: Refrigerate the strawberries for about 30 minutes or until the chocolate hardens. Serve chilled and enjoy!